Use the setup visibility dialog to specify what's visible in a Model View object, as part of an interface, template, or story page. It will come up automatically when you add a page to a story, and can be displayed later by clicking on the Change visible variables button on the properties panel for a Model View.
Use the zoom button in the upper right-hand corner to zoom in or out on the diagram, and the scroll bars to move around the diagram.
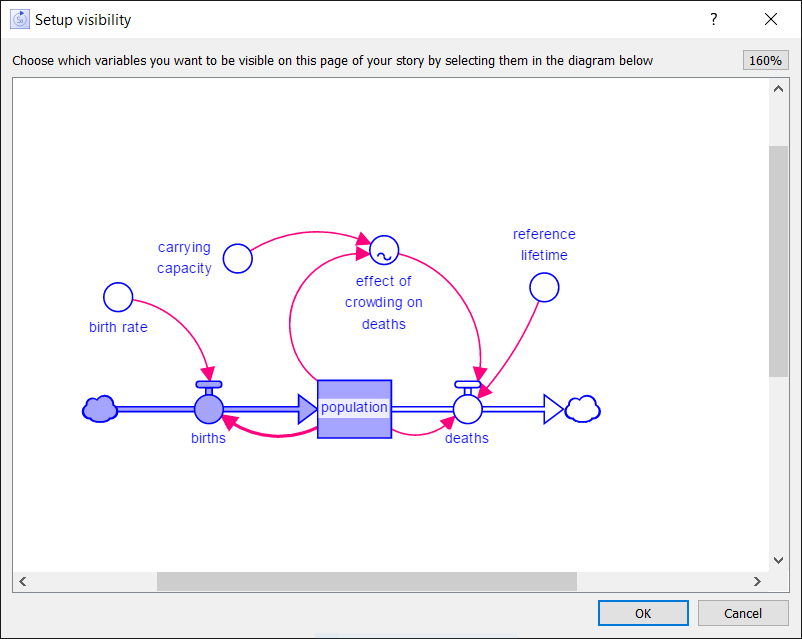
Click on a variable or the arrowhead of a connector to select it. Selected variables are highlighted in a different color. Selected connectors are drawn larger than normal (see the connector from population to births, in the above screenshot). Other components, such as graphs and tables, are drawn gray if not selected, and normally if selected.
Anything that's highlighted will be visible in the model view. Anything that's not highlighted won't show up. You can select anything on the diagram, but it will work best to not include tables, graphs, graphics frames, or numerical displays in the selection. It's better to place such elements directly on the interface page, or in a Template, to minimize the chance that changes to the model will interfere with the interface in unexpected ways.
Note: Only variables and connectors will retain their visibility settings when you replace the model associated with an interface; everything else will be marked invisible (see Interface Menu (Interface) for more details).
You can select multiple objects at one time by dragging over them, which will draw a selection rectangle.
When you add a variable, it will also be marked as highlighted (see Setup highlights dialog for more information), except when you use the drag-selection technique.
Click on OK to accept your changes, or Cancel to discard them. When this dialog first appears, the default state is to show nothing, so Cancel is the same as highlighting nothing on the diagram.